Monday, 28 March 2011

Project 2 Stage 2

Stitching in straight lines.

I started with different stitches and stitched from close together to spaced. I chose to stitch on a black fabric and found it give the thread a kind of richness. Unfortunately in the photographs the black gets a little washed out.


After the straight stitching I experimented with  curved lines, overlapping lines and swirls:


following this I experimented with different sized thread


and finally different size thread together:

Sunday, 27 March 2011

Project 2 Stage 1

Now to stitching.
I have found this Stage a little confusing and not really sure what I am expected to produce.In the end I just went ahead and did what I thought was going to be useful. I looked through my collection of fabric and bits and started to sort them into colour groups as suggested. Following this, as I have not really done any embroidery, I decided to try out as many stitches as possible. Using 'The Embroidery Stitch Bible' by Betty Barnden published by search press, I made some samplers of the Stitches for fabric.(I decided to leave the canvas stitching for another occasion.) The results are below:


After this I decided to try and copy some of the marks I made in Project 1using some of the stitches from the samplers:


straight stitches

Back Stitch

Back stitch

knots

Friday, 18 March 2011

Project 1 Stage 3 & 4

Well still keeping to my timetable.
 I have spent the last week searching through my postcards of artists work, looking especially at the way marks have been made. It has been an interesting exercise trying to take away the colour and just look at the texture and form. I then looked through photographs to find some images that would be good for Texture drawings. I am happy with them all save the landscape but I think that is because it is a little too obvious. Anyway Below is what I have done, not too bad a Days work:


coloured charcoal black ink and graphite pencil


wax resist and black ink wash red and yellow ink put on with a toothbrush and charcoal

brown oil pastel covered in black ink then scratched off, Blue ink and bleach, green wax rubbing of brick painted with black ink on separate paper ripped and stuck on

pencil + 2x ink and bleach

top: wax resist , black ink and marker pen, Middle and bottom oil pastel painted in permanent ink scraped using various marks 
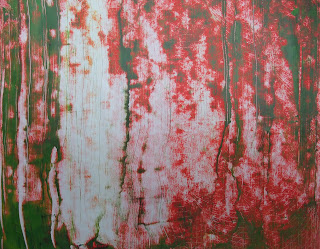
top wax resist scraped then painted with red ink and scraped again. the red lines are the first scrape, white the second Bottom the same as the top but using blue oil pastel instead

Tuesday, 15 March 2011

Project 1, Stage 2


Friday 11th March. Having spent several days reading through the handbook and dreaming of starting I had a day to myself and could begin. I gathered all the mark making things I could find and my A3 sketch book and began to play. I have done some mark making before but mainly looking at process rather than trying to draw to an emotion. It was a good practice for me as it made me expand a little on the usual marks that I make.

I am happy with the results I did on the day and it inspired me to look back at some mark making that I have done over the last year with my art group. I would like to try Fixative transfer but have no fixative in the house only hairspray, and also rubbing's but I ran out of time, perhaps at the weekend with the kids.
Anyway here are some pictures of what I did with a note of what they are.

making marks in an expressive way
making marks in an expressive way.


Mark making felt tip, charcoal and felt tip
Mark making pencil, graphite stick and charcoal pencil
mono print 
splattering paint (Background charcoal scribbles smudged)
painted paper ripped and woven
Acrylic paint scraped on then off shiny card. also hairbrush scraped over remaining wet paint.
Acrylic paint scraped in swirls with hairbrush
Acrylic paint scraped on then off shiny card
ink and charcoal
ink dropped on wet paper and bleach spots
coloured charcoal ink brushed and ink splatters
wax resist and ink