Tuesday, 6 September 2011

Project 4 Experiments with printing and painting Stage 2

Block Printing and Relief Printing:

I started by making some sketches of simple shapes I could use for making into a printing block. I looked over the mark making I had done in my old sketchbooks then made up some blocks. Below is the result


Lino block printed in layers of colour on white

Lino block cut so that the pattern can be tessellated

foam block repeating and layered gold over red

Foam block with the paint rolled on in stripes of red blue and gold before printing 

two blocks used over patterned paper

blue and gold on layers of coloured tissue 

gold on patterned paper

Project 4 Stage 2, 3 and 4

Stage 2 Looking for shapes and drawing

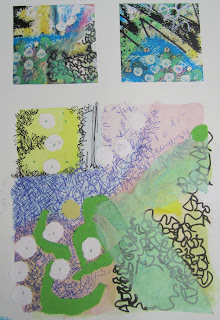
First I cut a viewing frame 5cm x 5cm and then took a series of photographs  looking through the viewing frame at sections of a couple of big doodle pictures I made some time ago. I printed off the pictures and then chose a selection to copy out again using collage, watercolour, oil pastel and pens:


I then took the last image and made several different versions of it looking at the textures, colours and shapes playing with the ideas and not fussy about accurately copying the image


Stage 4 Developing design ideas

For this stage I took the images I had made in the previous stage and manipulated them
  •  repeating and flipping the image:


  • Making a collage from prints of the images:


  • changing the colours:


Saturday, 2 July 2011

Project 3 Stage 6

Stage 6 Combining textures and colour effects:

Exercise 1

I started by grading French knots, red  through to orange. In the centre I have  grouped them very closely but spaced them out as you get to the edge


Next using pastel colours I graded through the colour wheel first very densely then more spaced out.The black background seems to make the colours more intense.


Lastly just for the fun of it I stitched some knots onto a piece of Felt I had made a last May.


Exercise 2
Working from a photograph of a Suffolk landscape I planned my last piece. I wanted to emphasise horizontal lines and the empty sky.


Initially I was planning to just use horizontal lines but when I started stitching the effect was not very dynamic. I then decided to stitch striped horizontal areas of colour, adding some vertical stitching to balance things out a little. The base fabric was a blue cotton with brown organza for the earth. I have added some white to the sky as it seemed a little lost when I had finished the stitching. 


I am pleased overall with the finished sample, the stitching needs to go right to the edge and I think if I were to work with this image more I would like to create a textured background first before stitching. I could also make the horizontal stripes all greens and yellows and balance the red of the buildings on the horizon with French Knot Poppies rather than the earth path and reeds. But then again the thing I love about this landscape is the blandness of it. The calm lines and the big sky. The fact you can see the town on the horizon but they are just tiny blobs. Perhaps what it needs is for the vertical reeds to be longer to give more of a sense of depth. Anyway not too bad for a first go.

Project 3 Stage 4 and 5

Stage 4 Colour Moods and themes

Exercise 1

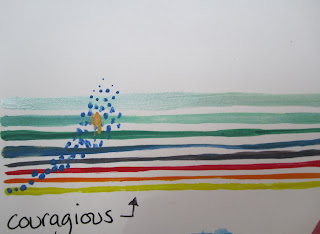
I did this exercise with my art group. We all wrote words down on paper and then put them in a pot. We then chose words at random and tied to paint with colour and textures that represented those words. These are the words I had:


Stage 5 Coloured Stitches

I started by mixing one block of primary colour with a second. I ranged the stitching from fairly dense to fairly open. 

The yellow on Blue stands out much more than the blue on yellow

I then experimented with coloured felt in blocks of colour. The Blue here stands out well even though is it a small patch.


Lastly for this section Imade a block of red and yellow stitched in different thickness  of thread and then added blue stitching over one half.


project 3 Stage 3

Recording Colours Accurately

Exercise 2 Mixing colours to match Fabric


Exercise 3 Mixing colours to match postcards


After painting the colours to match  played about a bit with the paint left in the palette.


Exercise 4 Mixing Colours to match 3D objects


Again I played with the left over paint